Lens Barrel Repair: Stuck Zoom & Focus Mechanisms
Stuck, grinding, or jammed zoom and focus mechanisms are among the most common mechanical failures on Mavica cameras. This guide covers diagnosis, common causes, and repair techniques for the lens barrel assembly.
How Mavica lens barrels work
All consumer Mavica cameras (FD and CD series) use motorised zoom lenses — the lens barrel extends and retracts via small DC motors and gear trains controlled by the camera's processor. There is no manual zoom ring. The focus mechanism is similarly motorised.
The lens barrel assembly consists of:
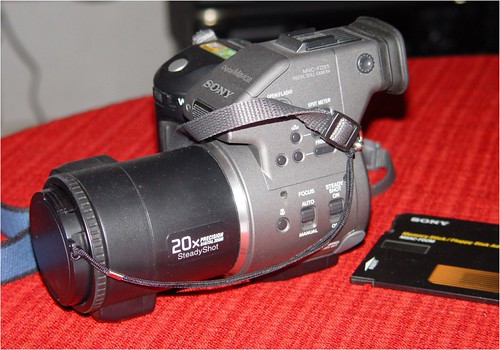
- Outer barrel: The visible tube that extends from the camera body
- Inner barrel: A second tube that moves within the outer barrel (on models with multi-stage zoom)
- Zoom motor: A small DC motor that drives the barrel extension via a helicoid gear or cam mechanism
- Focus motor: A separate motor that moves the lens elements within the barrel for focusing
- Lens elements: 4–8 glass or plastic elements in groups
- Aperture assembly: A variable iris inside the barrel
Common failure modes
Stuck extended (won't retract)
The lens barrel is fully or partially extended and won't retract when the camera is turned off. Symptoms:
- Camera turns on but immediately displays "C:32:xx" or similar error code
- Grinding or clicking noise when trying to retract
- Barrel is physically stuck in the extended position
Causes:
- Grit, sand, or debris in the barrel tracks
- Bent barrel tube (from impact or being forced into a bag while extended)
- Stripped gear teeth in the zoom motor drive train
- Dried/degraded lubricant causing the helicoid thread to bind
Stuck retracted (won't extend)
The camera turns on but the lens won't extend at all.
Causes:
- Same as above — debris, bent barrel, stripped gears
- Failed zoom motor (no power reaching the motor)
- Broken flex cable connecting the motor to the main board
Grinding or rough zoom
The lens extends and retracts but with audible grinding, scraping, or rough movement.
Causes:
- Sand or grit between barrel tubes
- Early-stage gear wear (teeth beginning to strip)
- Misaligned barrel tubes after a drop
Focus hunting (won't lock focus)
The lens barrel extends correctly but the camera cannot achieve focus — the lens racks back and forth continuously.
Causes:
- Debris in the focus mechanism
- Failed focus motor
- Damaged lens element (cracked, decentred, or fogged)
- CCD or autofocus sensor failure (not a lens issue — diagnose separately)
Cosmetic damage
- Scratched front lens element
- Cracked filter thread ring
- Dented barrel (usually from impact)
Diagnosis before disassembly
Before opening the camera, try these non-invasive steps:
Power cycle test
- Remove the battery for 30 seconds
- Re-insert and power on
- Listen: does the motor try to drive? Can you hear grinding, clicking, or silence?
- If the motor sounds normal but the barrel doesn't move: mechanical binding
- If no motor sound at all: electrical failure (motor, flex cable, or main board)
Gentle manual assist
Caution: Apply only the lightest hand pressure. Forcing the barrel will strip gears.
With the camera powered on and trying to extend:
- Gently apply light inward pressure (for stuck-extended) or outward pressure (for stuck-retracted) while the motor runs
- If the barrel begins to move: debris or dried lubricant is the likely cause
- If the barrel is completely immobile: mechanical damage (bent tube, stripped gears)
Compressed air
With the camera powered off and the barrel partially extended:
- Use a can of compressed air (held upright to avoid propellant liquid)
- Blow into the gap between the barrel tubes
- Rotate the camera to access all sides
- Power on and try again — sometimes this dislodges loose debris
Disassembly and repair
Warning: Mavica cameras contain a flash capacitor that stores a potentially lethal charge even when the battery is removed. Discharge the capacitor before working inside the camera. See the Flash Capacitor Safety article.
Tools
- Phillips screwdrivers (#00, #0, #1)
- Plastic spudgers
- Fine-point tweezers
- Isopropyl alcohol (90%+)
- Cotton swabs (pointed tips)
- Small amount of silicone-based camera lubricant (never petroleum-based)
- Lens cleaning supplies (microfibre cloth, lens cleaning fluid)
- A clean, well-lit workspace with good magnification (loupe or magnifying lamp)
General procedure
The exact steps vary by model, but the general approach:
- Remove battery and discharge flash capacitor
- Remove body screws — 6–12 Phillips screws on the back and bottom panels
- Separate the body halves — carefully, noting the locations of flex cables
- Disconnect flex cables from the main board to the lens assembly
- Remove the lens assembly mounting screws (typically 3–4 screws securing the lens barrel assembly to the front chassis)
- Lift out the lens assembly as a complete unit
Cleaning the barrel
With the lens assembly removed:
- Extend the barrel fully by manually rotating the zoom gear (visible on the outside of the assembly)
- Inspect the barrel tubes for visible debris, sand, or grit
- Clean between the tubes with a cotton swab dipped in isopropyl alcohol
- Rotate the barrel manually through its full range while cleaning
- Dry completely before reassembly — never reassemble with residual alcohol
Addressing stripped gears
If the zoom drive gears are stripped:
- Inspect the gear teeth under magnification
- If only a few teeth are damaged, the gear may still function with reduced reliability
- Full gear replacement requires sourcing a donor camera of the same model — aftermarket gears are not available
- Extract the gear from the donor unit and swap
Re-lubricating the helicoid
The helicoid is a spiral thread that converts the motor's rotary motion into the barrel's linear extension.
- Clean all old lubricant from the helicoid threads with isopropyl alcohol
- Apply a very small amount of silicone camera grease (e.g., Nyogel 767A or similar)
- Work the barrel through its full range several times to distribute the lubricant evenly
- Wipe any excess — over-lubrication attracts dust and causes more problems than it solves
Straightening a bent barrel
If the outer or inner barrel tube is bent from impact:
- Mild bend: Sometimes a gentle, even hand pressure can straighten it enough for function. Apply pressure slowly and evenly, checking alignment frequently.
- Severe bend: The barrel tube is effectively unrepairable. Source a donor camera.
Reassembly
- Reinstall the lens assembly in the chassis
- Reconnect all flex cables — verify each ZIF connector is fully seated
- Test before closing the body: Insert a battery, power on, verify zoom and focus work through full range
- Close the body, replace all screws
- Test again with final assembly — shoot a test photo to verify image quality
Prevention
- Power off before storing: Never put a Mavica in a bag with the lens extended
- Keep away from sand: Beach environments are the #1 cause of debris-related barrel jams
- Don't force the zoom: If the motor sounds strained, stop using zoom immediately
- Store with the lens cap or body cap: Prevents dust accumulation on the front element and barrel opening
Related Knowledge
Mavica Lens Systems: Sony vs Carl Zeiss
A detailed comparison of the Sony-branded and Carl Zeiss Vario-Sonnar lenses used across the Mavica lineup — optical design, coatings, and real-world performance differences.
Camera TechnologySourcing Replacement Parts
Where and how to find batteries, floppy disks, adapters, and donor cameras for Mavica repairs.
Repair & RestorationOptical Zoom vs Digital Zoom
Understanding the difference between optical magnification (real lens movement) and digital zoom (software crop) across the Mavica lineup.
Camera TechnologyCommon Mavica Failures
The most frequent hardware problems across the Mavica lineup and which are repairable vs. terminal.
Repair & RestorationFlash Capacitor Safety: Essential Precautions for Mavica Repair
Every Mavica camera with a built-in flash contains a high-voltage capacitor. This component can deliver a dangerous electrical shock — even when the battery is removed. This article explains the risks and how to safely discharge the capacitor before any internal repair work.
Repair & Restoration