Flash Capacitor Safety: Essential Precautions for Mavica Repair
Every Mavica camera with a built-in flash contains a high-voltage capacitor. This component can deliver a dangerous electrical shock — even when the battery is removed. This article explains the risks and how to safely discharge the capacitor before any internal repair work.
The danger
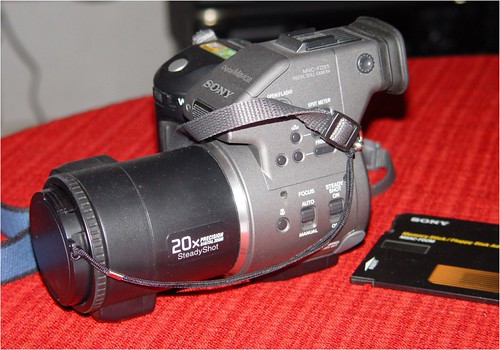
Every Mavica camera with a built-in flash (all models except the FD5) contains a photoflash capacitor — an electrolytic capacitor that stores energy at 300–330 volts DC. This capacitor is charged whenever the flash is active and retains its charge for extended periods after the camera is turned off and the battery is removed.
Why it's dangerous
- Voltage: 300V DC is far above the threshold for cardiac arrest (as low as 50V AC across the chest)
- Energy: A typical Mavica flash capacitor stores 2–5 joules — enough to cause severe burns, muscle contraction, and in worst cases, cardiac fibrillation
- Persistence: A charged flash capacitor can hold a dangerous charge for hours, days, or even weeks after the battery is removed. The self-discharge rate depends on the capacitor's age and condition.
- Surprise: The capacitor's terminals are exposed inside the camera body. Accidentally touching them during disassembly is the most common cause of flash capacitor shocks.
This is not a theoretical risk. Camera repair technicians have been hospitalised from photoflash capacitor shocks. Treat every flash capacitor as charged until you have personally verified it is discharged.
Identifying the flash capacitor
The flash capacitor is a cylindrical electrolytic capacitor, typically:
- Size: 15–25mm diameter × 25–40mm tall (depending on model)
- Colour: Black, dark blue, or silver metallic sleeve
- Markings: Rated voltage (330V or 350V) and capacitance (80–200µF)
- Location: Near the flash tube, usually in the upper portion of the camera body
- Connected to: The flash circuit board via two leads — one marked with a stripe (negative)
When to discharge
Always discharge the flash capacitor before:
- Opening the camera body
- Disconnecting any internal flex cables
- Removing the flash assembly
- Working near the upper portion of the camera body
- Any repair involving the lens barrel, LCD, or main board (the capacitor leads may be routed nearby)
Discharge methods
Method 1: Passive discharge (safest, slowest)
- Remove the battery
- Turn the camera's power switch to ON (this connects the capacitor to internal discharge paths)
- Wait 24–48 hours
- The capacitor will self-discharge through internal resistance
Pros: Zero risk, requires no tools Cons: Very slow. Not all cameras discharge fully through passive paths — aged capacitors may retain a partial charge even after 48 hours.
Method 2: Flash drain (recommended first step)
- With the battery still installed, turn on the camera
- Enable the flash (set to "Flash On" or "Fill Flash" mode)
- Fire the flash by taking a photo — this discharges the capacitor through the flash tube
- Immediately remove the battery after the flash fires
- Do NOT turn the camera back on (the flash circuit may re-charge from residual power)
Pros: Quick, effective, discharges through the intended path Cons: Requires a working camera — not helpful if the camera won't power on
Method 3: Resistive discharge (for technicians)
This is the standard method used by camera repair professionals.
Materials needed:
- A resistor: 1kΩ to 10kΩ, rated for at least 1 watt (a 5W ceramic resistor is ideal)
- Insulated alligator clip leads or a purpose-built discharge tool
- A multimeter (for verification)
- Insulated gloves (nitrile or rubber — optional but recommended)
Procedure:
- Remove the battery
- Open the camera body carefully, keeping hands away from the flash area
- Identify the capacitor terminals (two leads, or the solder points on the flash PCB)
- Without touching the terminals, clip one end of the resistor to each terminal using insulated clip leads
- Wait 5–10 seconds — the resistor will dissipate the stored energy as heat
- Remove the resistor
- Verify with a multimeter (set to DC voltage, 500V range): measure across the capacitor terminals. The reading should be under 5V.
- If above 5V, repeat the discharge
Why a resistor, not a screwdriver? Shorting the capacitor directly with a metal tool (screwdriver, wire) creates an instantaneous discharge — a loud spark and a current spike that can:
- Weld the contacts
- Damage the capacitor (reducing its lifespan)
- Damage the flash circuit board
- Startle you into dropping the camera
A resistor provides a controlled, quiet discharge over a few seconds. It's safer for both you and the camera.
Method 4: Discharge tool (professional)
Camera repair shops use purpose-built discharge tools: essentially a pair of insulated probes connected through a resistor and an indicator LED. When touched to the capacitor terminals:
- The LED lights up (confirming charge is present)
- The resistor safely bleeds the charge
- The LED dims and goes off when discharge is complete
These can be purchased from electronics suppliers or built from a 2kΩ 2W resistor, an LED, and two probe leads.
Verification
After any discharge method, always verify with a multimeter:
- Set the multimeter to DC Voltage, range 500V or 1000V
- Touch the probes to the capacitor's positive and negative terminals
- Reading should be under 5V — ideally under 1V
- If above 5V, repeat the discharge procedure
Safety rules for Mavica repair
- Assume charged: Every flash capacitor is charged until proven otherwise with a multimeter
- One hand rule: When working near the capacitor, keep one hand behind your back or in your pocket. This prevents current from flowing hand-to-hand across the chest (the most dangerous shock path).
- Insulate your workspace: Work on a rubber mat or wooden surface, not a metal bench
- Don't work alone: If possible, have someone nearby who knows where the camera is and can call for help
- No jewellery: Remove rings, watches, and bracelets — metal jewellery on the hand touching a charged capacitor guarantees a severe burn
- Mark it: If you're interrupted during a repair, leave a note on the camera: "FLASH CAP — NOT DISCHARGED" if you haven't verified discharge
What if you get shocked?
If you accidentally touch a charged flash capacitor:
- Muscle contraction: Your hand will clamp involuntarily. If you can, pull away immediately.
- Burns: Check for entry and exit burns on the fingers — they may appear small but can be deep.
- Heart rhythm: If you experience chest pain, palpitations, dizziness, or shortness of breath after a shock, seek medical attention immediately. Flash capacitor shocks have caused cardiac arrhythmias.
- Numbness or tingling: Persistent numbness in the affected hand may indicate nerve damage — see a doctor.
Most flash capacitor shocks result in a painful but superficial shock. However, the potential for serious injury means prevention is always the correct approach.
Capacitor condition in aged Mavica cameras
Electrolytic capacitors degrade over time:
- Dried: The electrolyte inside can dry out, reducing capacitance. The flash may fire weakly or not at all. Paradoxically, a dried capacitor may be less dangerous because it can't hold as much charge.
- Leaked: Dark brown residue around the capacitor base indicates electrolyte leakage. This can corrode the PCB traces around it.
- Bulged: A visibly swollen or bulged top indicates the capacitor has failed. Replace it.
- Still functional: Many 25-year-old Mavica flash capacitors are still fully functional and fully dangerous.
Never assume an old capacitor is safe because of age. Test with a multimeter.
Related Knowledge
Flash on Mavica
A guide to the built-in flash on Mavica cameras — modes, range, guide numbers, and tips for getting good results with a small on-camera flash.
Camera TechnologyLens Barrel Repair: Stuck Zoom & Focus Mechanisms
Stuck, grinding, or jammed zoom and focus mechanisms are among the most common mechanical failures on Mavica cameras. This guide covers diagnosis, common causes, and repair techniques for the lens barrel assembly.
Repair & RestorationSourcing Replacement Parts
Where and how to find batteries, floppy disks, adapters, and donor cameras for Mavica repairs.
Repair & RestorationCommon Mavica Failures
The most frequent hardware problems across the Mavica lineup and which are repairable vs. terminal.
Repair & RestorationLCD Screen Replacement on Mavica Cameras
The flip-out LCD is one of the most common failure points on floppy and CD Mavica cameras. This guide covers diagnosis, sourcing replacements, and the repair process for the ribbon cable and LCD panel.
Repair & Restoration